

Crafting Heartfelt Tributes with Microsoft Word: An Obituary Template Guide
In moments of grief and loss, writing an obituary for a loved one can be a challenging yet essential task. Microsoft Word, one of the most widely used word processing programs, offers a convenient platform for creating a heartfelt tribute. In this article, we’ll explore how to use Microsoft Word to craft a meaningful obituary using a template.
Why Use Microsoft Word for Obituaries?
Microsoft Word provides several advantages when it comes to crafting obituaries:
- Familiarity: Many people are already familiar with Microsoft Word, making it a comfortable and accessible choice for writing.
- Customization: Word offers extensive formatting options, allowing you to personalize the obituary to suit your preferences.
- Ease of Sharing: Once your obituary is complete, it can be easily printed, saved, or shared digitally with family, friends, and local newspapers.
Step-by-Step Guide to Using a Microsoft Word Obituary Template
Step 1: Open Microsoft Word
Open Microsoft Word on your computer. If you don’t have it installed, you can use Microsoft’s online version through a web browser.
Step 2: Search for an Obituary Template
In the search bar at the top of the Word window, type “obituary template” and press Enter. Word will provide you with a variety of obituary template options to choose from.
Step 3: Select a Template
Browse through the available obituary templates and select one that suits your preferences and the style you wish to convey. Click on the template to open it.
Step 4: Customize the Template
Replace the placeholder text in the template with the specific details of your loved one. This includes their full name, birth and death dates, place of birth, family information, education, career, hobbies, achievements, and any other relevant information. You can also customize the fonts, colors, and formatting to your liking.
Step 5: Add Photos
If desired, insert a photo of your loved one into the obituary. To do this, click on the “Insert” tab in Word’s menu, select “Picture,” and choose the photo you want to include.
Step 6: Proofread and Edit
Thoroughly review the obituary for accuracy, clarity, and completeness. Make any necessary edits to ensure that it accurately reflects your loved one’s life and legacy.
Once you are satisfied with the obituary, save the document to your computer or cloud storage. You can then print copies for distribution at the funeral or memorial service or share it digitally with friends and family.
Funeral Obituary Cards
-
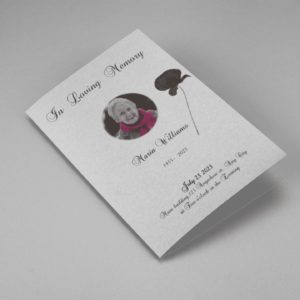
 Sale
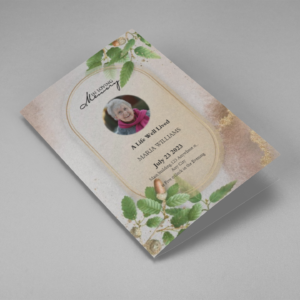
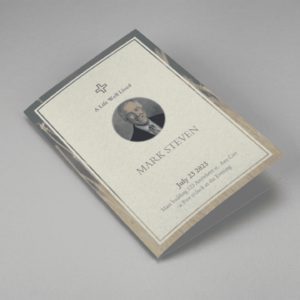
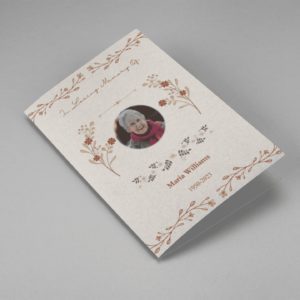
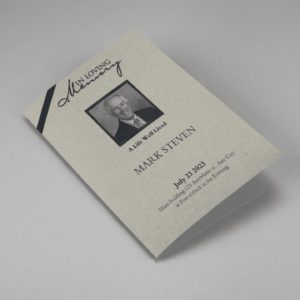
SaleSearching for a Oak Leaf With Gold Oval Frame Half Page Funeral Program that is easy to print and amass and has a cutting-edge look? The Oak Leaf With Gold Oval Frame Half Page Funeral Program is the Perfect decision because it measures 8.5”x 5.5”.
- No Limitation on Content, Edit anything
- Edit anytime – unlimited revisions even after purchased
- Get a printable PDF downloaded to get it printed on your own.
-
 Sale
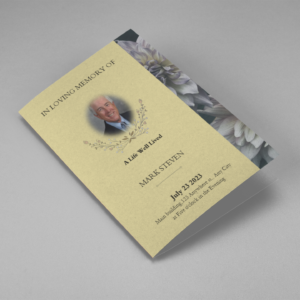
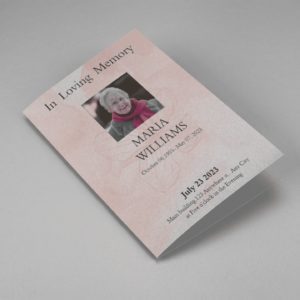
SaleSearching for a Brown and White Classic Funeral Program Half Page Program that is easy to print and amass and has a cutting-edge look? The Brown and White Classic Funeral Program Half Page Program is the Perfect decision because it measures 8.5”x 5.5”.
- No Limitation on Content, Edit anything
- Edit anytime – unlimited revisions even after purchased
- Get a printable PDF downloaded to get it printed on your own.
-
 Sale
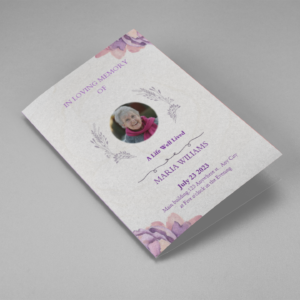
SaleSearching for a Purple Elegant Watercolor Half Page Funeral Program Template that is easy to print and amass and has a cutting-edge look? The Purple Elegant Watercolor Half Page Funeral Program Template is the Perfect decision because it measures 8.5”x 5.5”.
- No Limitation on Content, Edit anything
- Edit anytime – unlimited revisions even after purchased
- Get a printable PDF downloaded to get it printed on your own.
-
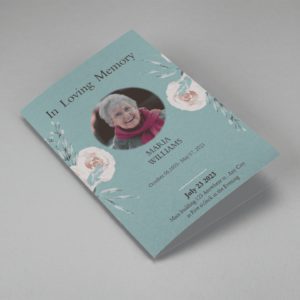
 Sale
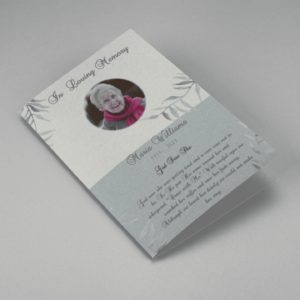
SaleSearching for a Cream and Green Photo Obituary Half Page Program that is easy to print and amass and has a cutting-edge look? The Cream and Green Photo Obituary Half Page Program is the Perfect decision because it measures 8.5”x 5.5”.
- No Limitation on Content, Edit anything
- Edit anytime – unlimited revisions even after purchased
- Get a printable PDF downloaded to get it printed on your own.
-
 Sale
SaleSearching for a Cream Simple Elegant Photo Church Half Page Program that is easy to print and amass and has a cutting-edge look? The Cream Simple Elegant Photo Church Half Page Program is the Perfect decision because it measures 8.5”x 5.5”.
- No Limitation on Content, Edit anything
- Edit anytime – unlimited revisions even after purchased
- Get a printable PDF downloaded to get it printed on your own.
-
 Sale
SaleSearching for a Samovar Silver Half Page Funeral Program Template that is easy to print and amass and has a cutting-edge look? The Samovar Silver Half Page Funeral Program Template is the Perfect decision because it measures 8.5”x 5.5”.
- No Limitation on Content, Edit anything
- Edit anytime – unlimited revisions even after purchased
- Get a printable PDF downloaded to get it printed on your own.
-
 Sale
SaleSearching for an Elegant Beige Half Page Funeral Program Template that is easy to print and amass and has a cutting-edge look? The Elegant Beige Half-Page Funeral Program Template is the Perfect decision because it measures 8.5”x 5.5”.
- No Limitation on Content, Edit anything
- Edit anytime – unlimited revisions even after purchased
- Get a printable PDF downloaded to get it printed on your own.
-
 Sale
SaleSearching for a White Floral Pro Half Page Funeral Program Template that is easy to print and amass and has a cutting-edge look? White Floral Pro Half Page Funeral Program Template is the Perfect decision because it measures 8.5”x 5.5”.
- No Limitation on Content, Edit anything
- Edit anytime – unlimited revisions even after purchased
- Get a printable PDF downloaded to get it printed on your own.
-
 Sale
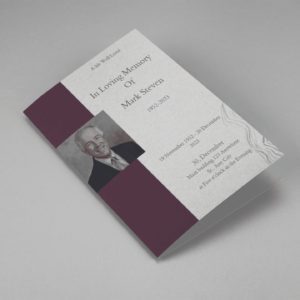
SaleSearching for a Grey and Burgundy Elegant Half Page Funeral Program Template that is easy to print and amass and has a cutting-edge look? Grey and Burgundy Elegant Half Page Funeral Program Template is the Perfect decision because it measures 8.5”x 5.5”.
- No Limitation on Content, Edit anything
- Edit anytime – unlimited revisions even after purchased
- Get a printable PDF downloaded to get it printed on your own.
-
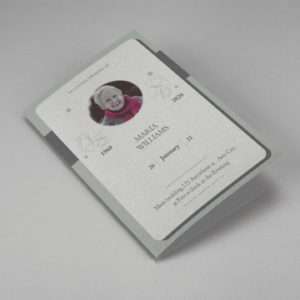 Sale
SaleSearching for a Soft Green and Grey Minimalist Floral Half Page Funeral Program Template that is easy to print and amass and has a cutting-edge look? Soft Green and Grey Minimalist Floral Half Page Funeral Program Template is the Perfect decision because it measures 8.5”x 5.5”.
- No Limitation on Content, Edit anything
- Edit anytime – unlimited revisions even after purchased
- Get a printable PDF downloaded to get it printed on your own.
-
 Sale
SaleSearching for a Gray Elegant Oval Frame Half Page Funeral Program Template that is easy to print and amass and has a cutting-edge look? Gray Elegant Oval Frame Half Page Funeral Program Template is the Perfect decision because it measures 8.5”x 5.5”.
- No Limitation on Content, Edit anything
- Edit anytime – unlimited revisions even after purchased
- Get a printable PDF downloaded to get it printed on your own.
-
 Sale
SaleSearching for a Blue Organic Minimal Half Page Funeral Program Template that is easy to print and amass and has a cutting-edge look? Blue Organic Minimal Half Page Funeral Program Template is the Perfect decision because it measures 8.5”x 5.5”.
- No Limitation on Content, Edit anything
- Edit anytime – unlimited revisions even after purchased
- Get a printable PDF downloaded to get it printed on your own.
-
 Sale
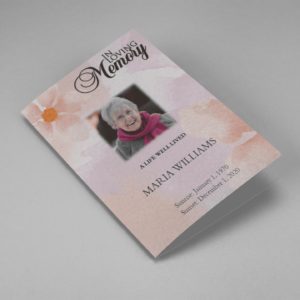
SaleSearching for a Pink and Orange Watercolour Half Page Funeral Program Template that is easy to print and amass and has a cutting-edge look? Pink and Orange Watercolour Half Page Funeral Program Template is the Perfect decision because it measures 8.5”x 5.5”.
- No Limitation on Content, Edit anything
- Edit anytime – unlimited revisions even after purchased
- Get a printable PDF downloaded to get it printed on your own.
-
 Sale
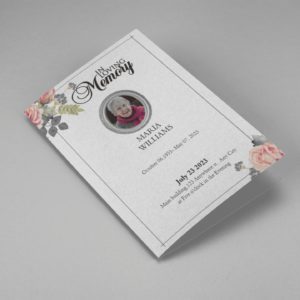
SaleSearching for a Pink Floral Paper Half Page Funeral Program Template that is easy to print and amass and has a cutting-edge look? Pink Floral Paper Half Page Funeral Program Template is the Perfect decision because it measures 8.5”x 5.5”.
- No Limitation on Content, Edit anything
- Edit anytime – unlimited revisions even after purchased
- Get a printable PDF downloaded to get it printed on your own.